

Extreme or Ultra Lenses and Optics.
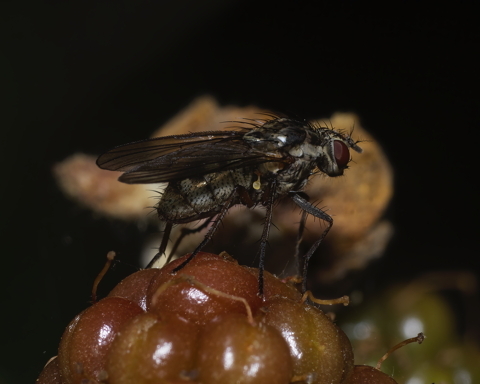
Warning - contains images of spiders
This article is going to go into the evolution of the optics I have used in macro photography from my earliest dabbling with film through to the current era where it represents a majority of the images I take for large chunks of the year.
What it is not going to go into is lighting or positioning in any detail. Not to say that does not have a place, I'm just going to try and concentrate on the lenses and devices in the optical path here, as the optics will be quite enough for one sitting. This is going to be technical, and I will try to define terms as I go.
Magnification Ratio.
The magnification ratio is the ratio of the subject size to the size it represents at the sensor irrespective of the sensor size. That's key, for the purposes of this section we're dealing with the reproduction capability of the optical path at a given distance that happens to be the distance to the sensor on my Olympus Micro Four Thirds body. That may vary on a different camera system, but this is the one I am using, and for purposes of comparison in this article let's take that as a constant. If using Medium format or other systems the magnification of the same optics may vary, based on the distance from lens mount to sensor, but we're ignoring that for now. If it helps imagine the sensor as a screen we're projecting onto and take the camera out of the equation.

I've included the 300mm f4 which is not a macro lens, but which does do excellent close up pictures to show the top end of the scale. Right down at the bottom end is the microscope objective, and in between are several generations of lenses and optical pathways. As you can see for a given magnification of 1:1, the commonest definition of true macro reproduction, there are many paths to that ratio, from a reversed standard lens through macro lenses at their closest to more complex systems at a lower magnification than they can create. Each has their own pros and cons, and we'll go over those in detail as we look at each system.
Working Distance.
The next key thing to know about is working distance. This is usually defined by manufacturers as the distance from the sensor to the subject, via the optical path, but that tends to be pretty useless in practise, the more useful definition being how close the lens can get, or has to be. I've measured approximate values for this in practise, and charted them below. The diagram is not to scale, it is just presented for comparison. Particularly the sensor to subject distance for the bellows is large and not really useful so I've not bothered with being precise with it.
There is another element to working distance I've not measured, but it comes down to the size of the thing you're pointing at the subject at what distance. A hoverfly may not be freaked by a big long lens 5 feet away, but it's likely to have other opinions about a big full frame macro lens, and other ideas again about a microscope objective. The diameter at the front of the system may also depend on lighting and other features. For example the 46mm filter thread 60mm macro with the Raynox spring mount is a lot larger, closer in size to the 58mm filter thread on the 90mm Tamron, but both are small compared to a ring flash. For example my Metz is 125mm across roughly. Lights if used can extend the frontal area of the assembly intruding into the subjects domain, but worst of all are the big flash diffuser hoods. Which for flowers is only important if there are obstructions, but for insects can be critical for access and their peace of mind. I'll address those when I get to lighting in another essay.

Much of the time precision here is achieved with a focussing rail or focus peaking in camera. The exact distance is not totally relevant, only an idea how close you'll need to get. For example with the microscope objective we're basically talking 1 cm or so, which is well inside most live subjects worry zone, and so is most likely useful for static subjects. That said I have a lovely 20x magnification image of the scales on the ruff of a footman moth which was live, well and flew off unharmed later that day. Depending on the subject though, you may choose to select a system based on working distance as a key factor for a given magnification.
Autofocus.
Common wisdom is that macro photography is done using manual focus, but even with my preference for manual focus and long history of not trusting AF I've found it has uses. The ability to change focus automatically or remotely helps ergonomically as well as technically. Dealing firstly with the ability to autofocus, my Macro Custom mode has the AF system set to Continuous AF. This is really useful with the 60mm lens in all configurations when using it handheld. While focus peaking and slow swaying will get occasional sharp shots having the lens do the work as I hold stable is better because the movement is internal to the lens and insignificant compared to the lack of precision moving me back and forth and the difficulty of stopping at a precise point and holding. The other key benefit to AF capable systems is that focus bracketing can be done automatically by the camera, creating large numbers of evenly spaced images for stacking. Assuming you can either handhold stably, or you are on a tripod or other solid support.
From an ergonomic position, when you're very close in to a subject, then putting your big hand round the front of the camera to turn the lens focussing ring is potentially going to scare off a subject. It can also be difficult when you're in a tight corner just to get your hand on the lens. With everything but the 60mm the focussing rail does that job, but with the 60mm I can focus remotely. I've also added a cable tie round the focus ring with regular markings and a handy knob where it joins that makes controlling the lens in tight corners and replicating focus brackets easier, especially in HD mode.
There are still problems, like the annoying focus limiter on the 60mm or the fact that if you get too close the lens refocuses to the wide end of whatever range the limiter is in making it slow to return. Both are massive flaws that do lose shots all too easily, and could be fixed by design. For instance the AF system instead of hunting to the far end could remember it is at the close end and reduce its hunting range with a macro lens. It could reference the IS system to see if the camera has moved in yaw or tilt, it could just have a macro mode that assumes proximity. To help with this I use the MkII more often as the back button AF on that stops the focus starting on shutter button half press, so if I want to stop focussing I can without stopping it shooting. The focus limiter annoys me because to get the 1:1 reproduction quickly you spring the focus limiter, which is faster than turning the lens umpteen rotations. The problem is it springs back to a limited position that is fine for this shot, but a real pain if the next thing I want to shoot is just out of range. Which happens all the time. Ideally the spring to closest focus would be a separate control, configurable to a button. Like many things, use it carefully and with understanding of when it might let you down.
With non AF lenses there are still AF features that help with manual focus, namely focus peaking that puts a highlight onto sharp edges when focussing, though this is useless at high ISO or with some lenses. I think the lens limitation is related to telecentricity, a controversial subject I'm choosing to skip over in this essay. The other useful feature is a magnifier, that allows what is sometimes called punch in focus. You can electronically zoom in on a portion of the viewfinder and adjust focus while zoomed. That works quite well with AF too, and I often use it with birds and the 300mm to prevent it grabbing the background.
Of course the other place it is not available is if you decide to use HD mode to create stacks. For a static subject like a fungus this is an ideal way to do things, and in the studio the Olympus Capture app allows you to move focus using electronic fine tuning controls that facilitate accurate focus bracketing. In the field however you're back to moving the camera or preferably rotating the lens barrel, and I have come up with ways to optimise the lens barrel movement.
In conclusion, for many uses manual focus is still very usable, or even preferable, and at the highest magnifications is still the only option, but there is a place for AF in macro work.
Focus Breathing and out of focus foregrounds.
Focus Breathing is the change in magnification ratio as the focus changes. It can be a nightmare for video as the frame zooms in and out with focus pulls, and therefore video lenses are often corrected for this. It can also be caused by moving the optical system in order to focus, so as the lens moves closer the framing tightens. So one of the key features when focus stacking is to align the images taking into account the magnification ratio. Fortunately this is taken care of by the software.
However it rears its head again when we start to deal with synthetic depth of field.

As you can see from this the purple card in the foreground is blurred in front of the background when the background is in focus. The result of this is you get a blurred edge to foreground elements when the total depth of field is far larger than the depth of field of an individual frame. The larger the aperture the more blur you get from the front elements of the scene and the worse the fringe. I have yet to find a good way round this completely. Using smaller apertures and shorter stacks rather defeat the main point of focus stacking. Tweaking the radius in Helicon where using method B depth map stacking has an impact and sub stacking is supposed to help, but I've not had any success with that so far. Effectively what you're trying to do is recover detail not in the image stack. The best I've done so far is to hide it using inpainting and clone tools to copy background detail from elsewhere into the affected areas, which is not good.
Systems.
I'll go over each system and it's pros and cons from the earliest onwards so you can see how I've evolved my system. I won't go into great detail of the modifiers on each system, as their impact is generally the same, but I will go over them for the 60mm.
Film Era.
Way back in the annals of history. Ok back when I was on Nikon before I bought into the Contax system, I bought the Tamron 90mm SP f2.5 Macro lens. This is an Adaptall II lens with interchangeable mounts for different camera systems, and so was usable even after I changed to Contax. The base magnification is 1:2, using an extending barrel pushing the front element forwards lengthening the lens. With a bespoke extension tube this could be brought to 1:1 magnification. f2.5 was great for a general purpose lens, and at the top end it could stop down to f32, giving huge depth of field. Manual focus with a very large throw (infinity focus to closest is roughly a full turn) meant it had precise focus for macro work.
I still have that lens, but it is larger and heavier to use. Whilst it does give a good working distance, you're always using the extension tube to get to 1:1 and the lack of internal focussing has a slight impact as the weight distribution of the lens changes and can change framing on anything subject to flex like lighter tripods and rails.
After I first published this essay I decided to take it out and see how it performed particularly at 1:1. I was pleasantly surprised by the results. The increased working distance is good, but not spectacular, it didn't help a lot with the labyrinth spiders who responded to it negatively as much if not more than the 60mm. But for other subjects if you could nail focus it has given good results. The above is a 2 image stack, and not much less sharp than the 60mm. The weight though and the need to either focus and then adjust aperture, or focus stopped down if possible make it hard to use handheld. Using it on a tripod to stack images of a shield bug on a bramble at 1:1 it was not as good as the 60mm, but that was due in part to movement between frames from the wind, to imprecise steps using the focussing ring, and to inconsistent lighting. The flash was low on batteries I think having seen how many images it didn't fire on, and probably didn't help, plus I had compensation dialled in that wasn't reflected in the EVF, because of having the flash on body, but not dialling back when I moved the flash off body. I didn't check the captures on the first 2 stacks, both of which were ruined. All of which makes it a lens I need to work harder to use well. But not bad when it does work.
My early attempts to go beyond 1:1 involved extra extension tubes, and then a 52mm coupling ring that allowed me to fit the 50mm Nikkor f1.4 reversed to the front of the 135mm f3.5, both having 52mm filter threads. However I was never really happy with this. The reproduction ratio is fixed at 2.7:1, the working distance is 2.5cm but the distance to the sensor plane is 23cm. At the time the 50mm f1.4 was the main lens I used when not seeking ever longer telephotos, and exposing the back of it made me very nervous about damage, having saved a lens from damage with a UV filter in recent history at that point. The other problem was the 50mm is a heavy lens, and the whole thing is unbalanced and hard to use. That said, I put it together again as part of writing this article to get some measurements just out of curiosity and was very impressed. Which just goes to show my memories of poor image quality were mistaken.
In practical terms I now have the Nikon reversing adapter that allows you to attach filters to the mount end of the lens, so I can put a filter on the lens mount to avoid dust and ensuing scratches. Despite that, this is a really cumbersome setup. The balance is very front heavy meaning strain on either the lens adapter foot, which is not robust, or the camera lens mount which is expensive to fix. The working distance is small, though perhaps not awful for the magnification, and perhaps most importantly it is pretty well fixed at a high magnification. Focussing the front lens has no visible impact, but focussing the 135mm does increase magnification slightly to maybe 3:1, but forces the whole thing to be moved back to accommodate the lens extending and a small shift in lens to subject working distance, albeit for a much larger change in sensor plane distance. I don't think this is a combination likely to get much use as the bellows is as sharp, if not sharper, and more useable.
When I shifted to Contax I took the opportunity to buy the Contax auto bellows when one came up.

These are amazing. They have a bag bellows which is connected to 2 standards (the black boxes in the photo) in the same way as a large format camera. The lens goes on the front, and there is an option to have a release that fires the camera and stops the lens down, or you can stop the lens manually using a small lock. The front standard has tilt and shift movements allowing you to recompose and optimise depth of field, and both standards move. The rear standard has a rotating cuff allowing the camera to be turned portrait, or any angle in between. The rail is on two parts and allows either the whole assembly to move back and forth, or the lower rail can swing 90 degrees to allow lateral movements, or the lower rail can be reversed to fit a slide copier. Basically it does everything you might need except vertical movements. Using a C/Y to MFT (Contax/Yashica to Micro Four Thirds) adapter I can fit the camera to it and take advantage of any lens I can adapt to fit on the front. The ability to work at any magnification ratio with a standard lens fitted from less than 1:1 up to 4:1 also made it very flexible compared to extension tubes or coupled lenses. Adding an M42 to CY adapter for the front end, and an RMS to M42 adapter has allowed me to convert the bellows into a tube microscope for very little cost. You can see the benefit of the tilt shift operations below. This is the wasp gall shot for the focus stacking essay where the lens has been tilted to better align the focal plane across the subject. The problem is a lot of blue and yellow fringing, and of course being square on to the subject to start with would be better, but this gives extra control where that is not easy.

In practical terms the bellows is a big piece of kit, and the bag section is relatively robust, but I'd hate to deal with any damage to it. It needs to be balanced on whatever it is moved on, to prevent vertical movement as it shifts for bracketing, but that is easy on the rail system. In terms of using it handheld, forget it. I can't see how you could with all the controls, but on a tripod it is fine though it gets a lot of vertical height to it that make it hard to get low to anything. It excels at static subjects, and can stack smoothly at all but the highest magnifications with the supports and rails I have.
In terms of lenses, the bellows is very much just a flexible extension tube, so magnification depends on the focal length of lens fitted. The Carl Zeiss 50mm f1.4 is a very sharp lens that gives up to 4:1 magnification on the 200mm rail. However I have a Contax to 52mm reversing ring that was bought at a camera fair, and allows me to reverse the Nikkor 50mm f1.4 onto it. With the Nikon reversing filter adapter I can leave that on the bellows all the time with impunity. The reversed lens gives a bit more magnification and working distance. To anyone working in a studio doing ultra macro I have to say a bellows is a good investment once you start to aim at higher magnifications.
For instance this is an example at the highest magnification with supplementary optics.
Olympus 60mm Macro and adaptations
Having moved to digital, the second lens I bought was the 60mm f2.8.

Well technically the third, but I tend to regard the 14-150 bundled kit lens as a gift, not a purchase as I had no choice when I bought my first body. I was used to sharp images before using the Carl Zeiss optics like the 180 f2.8, but this is perhaps the best I've used. As a single lens solution for close up and macro photography it ticks a lot of boxes. Although at 60mm the working distance is short, it is internal focussing so no balance or extension problems as you get closer, it is small and light, it has a narrow front element to reduce the problems getting close both mechanically and in terms of scaring subjects. It does focus bracketing and internal stacking, with decent AF performance, albeit with the awful AF engine Olympus have. There are some improvements I'd like but this is the difference between exceptional and perfect. I'd like some printed markings on the focussing ring and lens barrel to help with steps for manual focus bracketing, or even a rocker switch for configurable size focus steps. IS would be nice, a function button mappable to 1:1 magnification to avoid having to use the awful focus limiter. For that matter lose the focus limiter switch and give a function button mapped to the focus limits like I have set up on the 300mm. A focus clutch would be nice, rather than switching in the control panel. Compatibility with the teleconverters, possibly via a dedicated Olympus made tube. But as I said, all that is nitpicking. This is a light, mostly easy to use excellent lens. Hopefully a future longer focal length version, like a 100mm or 150mm will take into account the varied ways this lens is used.
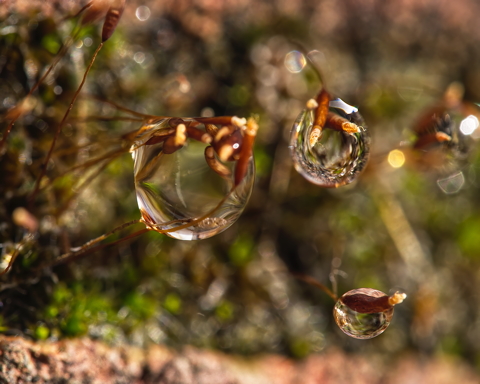
This image goes all the way back to 2016, when the lens was still newish to me. This is 1:1, handheld, focussing on the image in the water droplets via the sway method. I might use a smaller aperture and a tripod now for this, but at the time, I didn't have the carbon fibre tripod and the only rail was the Manfrotto, so hard to get the big aluminium tripod into position for a shot like this.
One of the clear benefits to the 60mm is that you can add the Raynox, or with a little tinkering the teleconverters. This makes the lens incredibly powerful as the centre of a higher magnification setup, using focus bracketing via the built in autofocus. In the field, handheld, at greater than 1:1 magnification you can get good focus brackets for stacking of anything reasonably static. While the rig is a bit larger and the precision of movement needed is higher to hold focus and framing, it is still very usable, especially with a convenient wall or post. For a while I was using only extension tubes to extend the magnification of the lens, but they are inferior to using the teleconverter as the teleconverter seems to improve the performance in terms of light gathering and off axis sharpness compared to just tubes as well as improving magnification.
It is so usable that even slowly grazing or moving insects can be tidied up in post, and basking or waiting spiders are more easily captured. For example this little beauty on the wall outside, a stack of 8 images handheld, by natural light. I mean really, what is the attraction of bird murdering cats when you have this little cutie killing off nasty biting insects and looking so adorable.

The Mitakon Diversion.
Back at the end of 2019, I made a decision to buy sight unseen, the about to be launched Mitakon 1-5x macro lens. It looked fantastic on paper, a Canon MP65 for Micro Four Thirds. When the lens turned up I got some good images from it, I thought, but within a few weeks the lens was recalled to China as it had been assembled incorrectly. The lens went back and eventually it returned with no real change to the image quality to my eye.
It would be easy to criticise the lens. and indeed the lens has flaws. I've never come across such a dust magnet, and dust on or in this lens is highly visible. I think that this is a lens that can produce good results, but, and this is a big but, it needs considerable care in use to get anything. Thinking this is a lens that you can just put on the camera and head out is a mistake.

As you can see at closest magnification it is quite extended. There is no focussing, the focus point is fixed and varies with magnification. Which means as you increase magnification you have to refocus which can be impossible in the field. You can't easily rotate the quite heavily damped magnification control whilst moving the lens. If rather you use the magnification as a focus and fix the lens distance somewhat it becomes less of a problem, but composition and focus are coupled rather more than in the other lenses I've used. The weight does move, and so the balance changes and this lens is heavy. So heavy it is hard to control purely handheld at all magnifications. But while it is just about possible to keep composition for a few seconds at 1x it is almost impossible to line up 2 frames at 5x. Handholding therefore becomes a problem, making it a difficult lens to use in the field casually. On top of which the lens really, really is not good in anything but the best light. The lens shipped with a USB powered screw in LED light that was really useful, but not bright enough for this lens. It did spend a lot of time on the 60mm with a step up ring. The Metz ringflash is not powerful enough and even the Nissin i40 when used off camera and positioned right over the subject is not always powerful enough. I reevaluated my opinion of this for this essay, and I managed to get down to ISO 400 at f2.8 right on top of the subject with the i40 with the supplied diffuser at 5x magnification and -0.7 stop compensation. Which is tolerable, but the flash at that point is basically 5mm above the lens barrel, and 30-40 mm from the subject.
Looking at the results from that shoot, none of the image stacks are usable. To be fair they were shot handheld, using high speed and swaying, though I did get the monopod out to support the weight with the lights on. I shot flash using the Nissin and continuous with both the Manfrotto lights and the big LED panel. The subject was a non biting gnat that was happily snoozing on the magnolia at 1x and upwards. The single shots are much better for example the uncropped image of the non biting gnat at 5x below.

The image is ok, it has narrow depth of field, which is only to be expected at the magnification, but the sharpness is not as good as the 60mm with Raynox and tubes, nor since I could not get a stack is it improvable for what in practise was a static subject. In retrospect it would have been good to shoot the same subject with the 60mm setup at maximum magnification with the same lighting, but I was concentrating on trying to prove to myself whether the Mitakon is actually a field lens. I don't think it is.
Which brings us to the question of whether it works in the studio when put up against both the 60mm and the bellows. The field advantages over the bellows of being more mechanically robust and ergonomically better go away and it becomes a direct competition. You can see from above the absolute quality achievable from the bellows, which is spectacular. However for comparison here is a similar composition, one shot long ago with the bellows and reprocessed for this article to match, the other from the Mitakon a couple of years ago.
Star Magnolia from Bellows |
Star Magnolia from Mitakon |
|---|---|
|
|
You can see the sharpness is excellent, the colour is not accurate in either, the bellows is poorly lit, but the Mitakon is well lit and still incorrect. I had to remove a fair amount of dust marks, but nothing very bad. Both have visual compression of the depth of field, and you get no feel for the height of the spike which is about 10mm high. Both were relatively easy to process like this, both have problems, but as you can see above, those with the bellows are relatively easily fixed.
In conclusion, is the Mitakon any good?. It doesn't fulfil the purpose it was originally bought for, it is not a good high magnification field setup. It is usable, and a little less hassle than the 60mm for single shots at high magnification, the 60mm needing the teleconverter and Raynox. It loses on focus bracketing, weight, lighting and size. In the studio it is capable, but the bellows is probably better and again the 60mm with accessories can outperform it. The most important thing it has done is encouraged me to think ever more about light and how to get it onto the subject. The LED ring light it came with is sorely missed, the USB connector having come off the board and ZYOptic never replying to contacts about repair or replacement. I have not yet found an equivalent light, but I'm using flash more and more only using continuous lights for focus brackets.
Microscopy
Finally, I decided to buy a cheap microscope objective to try to get high magnification in the studio. This was not a hugely thought out thing, but I found a 10x objective for a few pounds new and the adapters for RMS to M42 and M42 to C/Y were cheap. Of course having the bellows and lots of extension tubes already made life easy. Looking at photographic suppliers of microscope objectives they have high quality objectives for thousands of pounds, but I don't know if the quality is going to be that much better. Without using one, I can't tell, but this has been really good so far.

This is absolutely not for moving targets, it is not going to be used outdoors, or in the field, although it weighs less than you'd fear. The field of view is tiny, going from 2mm downwards. Surprisingly the objective at the infinity corrected 'tube' length of 160mm is bright even without supplementary lighting. It's also very sharp. But the depth of field is microns, maybe 10 microns and is very hard to use. That said, with care it is definitely producing acceptable images and I think practise, or maybe a motorised rail will make a difference.
In terms of practicality this is a fixed focus, fixed aperture system, focussing is by moving the system to and fro on a rail and even at the lowest magnification requires careful step size control. This is broadly the kind of system used for the insect portraits you may see occasionally, where panoramas of focus stacks of carefully cleaned dead insects are presented. That is absolutely not what I want to do with this. I want to use this for live insects where they will sit in the studio, like the moth, and for static subjects like flowers and textured surfaces and all those things we never see close up without aid.
In the field

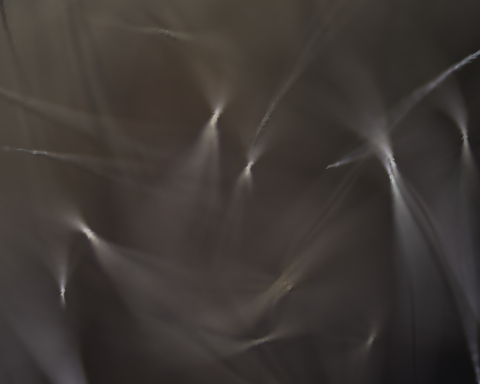
This is a tube lens, and can be used purely with extension tubes for a fixed focus experience. The minute depth of field makes it very apt for abstracts and more artistic images, but it can be focus bracketed in the field using the Manfrotto rail assuming a very, very, very still subject. That is not easy to find, and given the working distance is unlikely to be a live insect or spider subject, but I have taken a seedhead, put it into the sample holder and stacked in the lounge on a wet and windy night. Using the flash for illumination off camera this was actually reasonably easy and produced an acceptable result. It wasn't very interesting as a picture, but it was easier to achieve than I'd feared. So this has possibilities for artistic (as opposed to documentary or figurative) use and maybe for a focus stack.
Finis.
In summary then I've used a range of equipment, gradually evolving the capabilities, and may now have reached something close to a limit, in terms of being able to achieve almost everything I'd like one way or another.
One thing also worth noting. I dislike commenting on lens sharpness or image quality. Unless you have concrete measurements using MTF charts and the like, and standardise post processing then such observations are purely subjective. Even with charts, post processing can improve apparent sharpness, and even sharpness can be subjective. I'll possibly go into this more when I review post processing, but sharpness can be simulated using aliasing, and indeed some of my post processing probably does this. Post processing can also decrease sharpness intentionally where it is natural, and correct, but unsightly or distracting. For example the star magnolia heart has been up here for ages with a fair chunk of the stack excluded because the image works better with the background out of focus not sharp. It has been included complete here for comparison with the Mitakon. Some of the detail in both shots is synthetic, due to frames not having perfect focus overlap. Anyway, I think some of the options above are less sharp when I use them, that is probably a limitation in me as much as the equipment.
It is worth considering the upper limits reachable by the 60mm. By adding the MC20 2x converter and a higher diopter Raynox I have seen magnifications in excess of 11x. I doubt it will go much above that, but you get all the benefits of auto bracketing for an investment that is about the same as a motorised rail. The MC20 has other uses with the 300mm for example, and the Raynox similarly can be used in the field, although probably less often or readily than the 250 I already have. A motorised rail can be used in the field, and may give a new lease of life to the Mitakon, as well as working with the 60mm in HD mode. Given the higher magnification reachable with the microscope setup the motorised rail looks a good next investment. That said I have relatively few subjects that I have tried with the setups I have and maybe should keep on working with what I have and processing and uploading the images I have already.
| Equipment | Field use | Studio Use | ||
|---|---|---|---|---|
| Pro | Con | Pro | Con | |
| Olympus 60mm f2.8 Macro | Small, light, easy to hold, infinity focus, AF, automatic focus bracketing, automatic aperture, easily augmented past 1:1 | Working Distance is limited, lens ergonomics | As for the field. | 1:1 magnification unmodified, but with supplementary optics up to 5:1, and beyond is possible |
| Contax Bellows with 50mm Nikkor f1.4 reversed | N/A | Large, requires a tripod, benefits from lighting, requires fine motor control for stacks, | High magnification, flexible magnification and composition using perspective control, relatively light, easy to focus bracket with a rail, fast to use. | No automated aperture control, no automated focus bracketing, bulky |
| Mitakon Creator 1-5x Super Macro | High working distance, more mechanically robust than bellows, high magnification | Heavy, hard to focus bracket, poor low light capability | Lens collar for support and rotation | No automatic focus brackets, sharpness, needs lots of light |
| Microscope objective | Small and light as a tube lens | Tiny depth of field, hard to focus bracket, very small working distance | Very high magnification possible on bellows | depth of field needs the highest levels of control to focus bracket |
Legacy |
||||
| Tamron 90mm SP | Good Working distance | Heavy, large, no internal focus, no automatic focus bracketing | None compared to other options | Heavier, longer |
| Coupled 135mm and 50mm lens | fixed 2.7:1 magnification | Large, heavy, unbalanced, hard to aim, fixed 2.7:1 magnification with little scope to focus | None compared to other options | Probably lower image quality, heavier, longer |
| Reversed 50mm Nikkor directly | None compared to other options | Inflexible | None compared to other options | Inflexible |