Post Processing - making silk purses out of many threads.
This is a review of my post processing process for close up or macro photography. I have other approaches and techniques I use for other genres like mono, panoramas or landscapes etcetera. The majority of the concern here is in extracting the maximum detail and information from the subject.
Software
This is a summary of the applications I'm using. One thing to note is that these are all on specific versions where they work together well on my system and suit my workflow. For lots of reasons I won't be updating them voluntarily. I'm not going to detail versions, or go into why, but these techniques should all migrate nicely to other apps or versions.
Note, while some of the tools I use advertise 'AI', they are the equivalent of electric screwdrivers. They take the effort out of something repetitive and tiring, they are not creating images for me, just helping me refine mine.
FastRawViewer
I use this for triage and rapid grouping and filtering of images. It has focus peaking which I use to delete images at the end of stacks or where the camera has missed focus in a sequence of a moving target. It is also handy for looking at a number of similar images and picking the best composition.
Affinity Photo
This is my preferred photo editor. It is broadly a bitmap editing tool, but has some vector features for text and drawing elements, allowing it to be used for illustration. I sometimes make use of these to annotate images, like the one below. It has an excellent RAW development module which is sufficiently competent to give a good image from my cameras while being simple enough to control that you don't end up spending hours experimenting to find the magic sauce that gives the best quality from each file.
Affinity has batch processing capabilities and I use these regularly to apply standard changes, usually for output, or to process downstream. Often this is automating the export function.
Olympus Workspace
This is the Olympus RAW processor software, and replicates the JPEG flow in the camera. Some of the settings impact the RAW file like the High/Low key settings I use when taking mono images, but mostly I use this when I need to develop HiRes images from the camera. The Affinity RAW conversion of these struggles to get the sharpness, lacking the secret sauce the Olympus engineers baked in here.
Helicon Focus
This is my go to focus bracket processor. I usually throw RAW files at it, and it uses the Adobe DNG Converter to preprocess the camera RAW files. The output is a DNG file for these stacks which can be developed in Affinity. The big advantages it has over Affinity are the control it gives and the speed, especially since it can batch process brackets unlike Affinity.
Topaz Denoise AI
I use this ironically less for noise reduction and more for sharpening. In terms of noise reduction it is very good, but is prone to losing small details, so I don't always use it. It works best if Affinity has removed colour noise first. The downside is it is very slow compared to just pushing a slider in Affinity, but it does a good job of sharpening so it can be worth it. It also fails horribly with mono images, so I don't use it for that. Again batch processing is supported, so if I have a focus bracket with lots of noise either from higher ISO or long exposures I can batch convert to TIFF in Affinity then batch process here before throwing over to Helicon.
exiftool
This is a swiss army knife par excellence. It allows inspection and scripting based on attributes of the RAW files. For example -DriveMode as an option helps find where the camera has bracketed images. I use it to add detailed License information beyond the fields the camera can add, and I have custom fields defined now to help with workflow.
Custom scripts
Being a hacker by inclination I use exiftool and its perl integration to do a lot of little scripts and tweaks to process RAW images. One of the regularly used scripts orders images by Name and Date Created and splits stacks based on the content of the DriveMode field. This allows me to pull camera automated focus brackets into sub folders for stacking. With a minor tweak it also handles HDR groups now.
Another script is installed on every SD card and sorts images into a sub tree based on date. This hides the images from the camera which doesn't understand the structure, which is often handy in the field to only see todays images. I can then pull the tree onto the desktop machine where I can further process.
GraphicConverter
Rarely used in the processing of images from RAW to processed image, this is the tool that does all the automation of building responsive image groups for the website. It is excellent for reviewing outputs and curation, and gets used for that frequently. It has one trick that none of the other apps can do, namely it can de-skew images, by applying a geometric grid that the Affinity Photo mesh tool might do, if only it was usable. This is a combination of horizontal and vertical stretching that simply fixes parallax. You might be able to do this with the lens tab in Affinity Develop but I've yet to replicate it as quickly and easily as this works. I never use this on macro photos, but it is rather handy for architecture.
Green route
Tone curves, highlights and ETTR
The Olympus camera is a bit prone to over-expose in my opinion. I use centre weighted metering because at the end of the day I can review the frames and from my film days that was the metering mode I used most. The exposure histogram on the camera comes from the JPEGs and tends to suppress highlights so it cannot be relied on for an Expose To The Right (ETTR) approach. Rather, since I want to preserve the micro detail that is in the highlights, and I want to be able to optimise those, I need headroom over the top end of the highlights. So I tend to expose a little on the dark side of correct. Aside from which I like to have shadows and blacks where I can. As a result I don't use any real scientific maximisation of the histogram, rather I try to capture images which look well exposed, or perhaps a little dark in the camera. If a subject has a lot of light colours, like a white bindweed then I will underexpose to try to give extra headroom to bring out highlight detail. The macro custom settings I have on the camera under-exposes by ⅔ of a stop, with the flash compensation set to overexpose by ⅓ of a stop. The flash compensation is linked to the exposure compensation, and I regularly under-expose by as much as 2 stops to protect highlights, which with the flash compensation works out at 1 and ⅔ stops under-exposed.
This goes against a lot of opinion about using ETTR. The theory behind using ETTR is based on the idea that you want the best signal to noise ratio, and that the noise is more significant at lower signal levels. Therefore by moving the histogram so that the brightest details you want to preserve are at the maximum signal, then you have the best signal to noise ratio. In post processing you stretch the histogram so that you restore the darkness of the shadows. There are several issues here. Firstly you need to trust the data you are being shown. In my experience the histogram display on the Olympus cameras is not sufficient to show where the highlights actually end. Secondly when you stretch the histogram from the top I often find posterisation can creep into the histogram, where you get a comb like shape to the histogram. This is where you have stretched the histogram so far that you are losing the smooth transition of tones. Thirdly a lot of the processing tricks I use to emphasise the small details increase contrast and push the highlights out. I process to preserve the highlight detail as much as I can, so if the exposure is too bright, then I lose the ability to emphasise details. Please note, I'm talking here about emphasising details by boosting contrast in very small areas, not creating detail, but making it more visible. Some of that detail may be noise, but the noise level is usually low enough that the techniques used don't start to manufacture details at the resolutions I'm working at.
It is probably easier to run through a series of images and show what I mean.
Raw Processing in Affinity
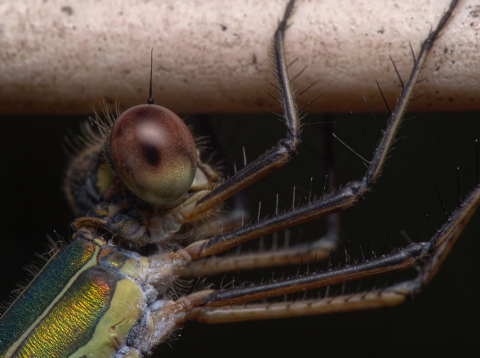
First off the output. The bit we're interested mostly in preserving detail in is the structure of the eye..
The image here is a single frame at f11 with flash. The 'pipe' is actually a clothes line that the demoiselle is hanging from. The image is at f11, ISO 200, 1/250s, with an exposure compensation of 0.0.
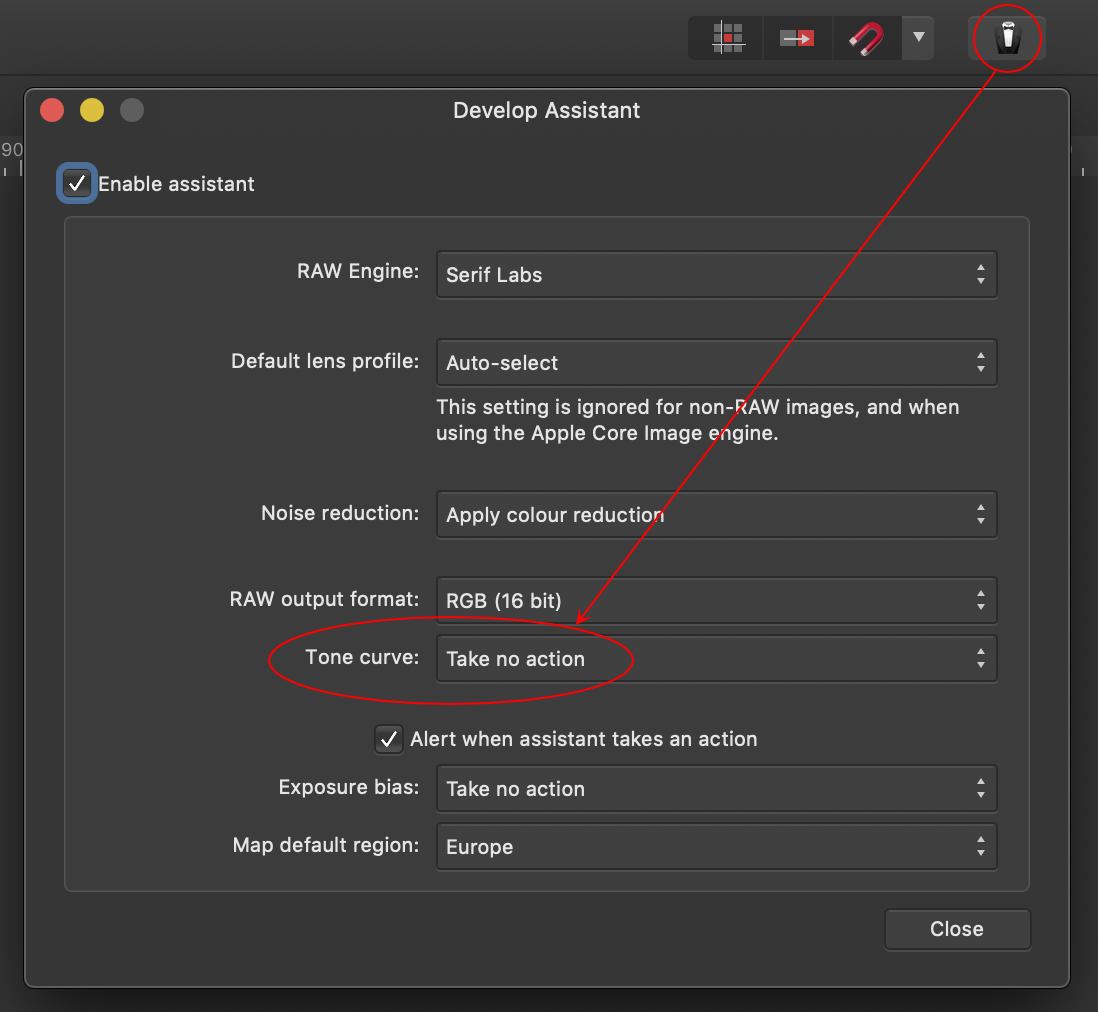
Opening it up in Affinity with the tone curve applied looks very similar in terms of colour, but looking behind the head there is more shadow and looking at the highlight on the eye there is little to no detail visible because the contrast is low. Therefore I have configured Affinity to ignore Tone Curves in the Assistant Options.
As you can see the basic image is there, but there is a lack of detail in the eye. Now if we switch off the tone curves and open in Affinity it looks like this.
Comparing the histograms, you can see what you would expect, that the image without the tone curve applied has a much narrower shape shifted to the left.
Conventional wisdom would dictate that there is less contrast and less detail there than we want. However, this is a 16 bit format, and our target is 8 bit on screen or in print. 16 bit offers a lot more nuance and detail than we can display, and even with HDR screens appearing, these are not the norm yet, nor even if they ever become normal would they impact the print world. So while the narrower profile might look bad, it is going to be stretched by the processing.
Starting with RAW development, we want to recover detail so let's apply the detail tab.
Press play for the high resolution video.
Transcript
00:00:00.000 --> 00:00:39.000
first off we'll adjust the detail sliders.
First pushing up to maximum then trying to find a sweet spot balancing noise and enhancement
00:00:39.000 --> 00:01:04.000
then we'll do the same with clarity
raising it then backing off to get the best enhancement without losing anything
00:01:04.000 --> 00:01:10.000
and hit develop before sending off to Topaz
00:01:10.000 --> 00:01:25.000
just use the auto settings in Topaz on the Detail tab
00:01:25.000 --> 00:01:55.000
just eek out the last details with unsharp mask
00:01:55.000 --> 00:02:31.000
zoom in on a bright section
adjust for maximum effect and try to find a sweet spot
00:02:31.000 --> 00:03:00.000
let's deal with the exposure with a levels adjustment
set the black then try to reduce the white level to a point where we are not blowing highlights
00:03:00.000 --> 00:03:41.000
add in a quick curves adjustment to boost the high- and midtones
00:03:41.000 --> 00:03:52.000
finally add the channel mixer to boost colours
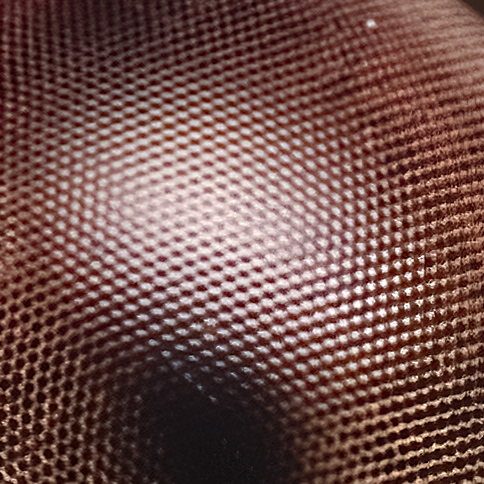
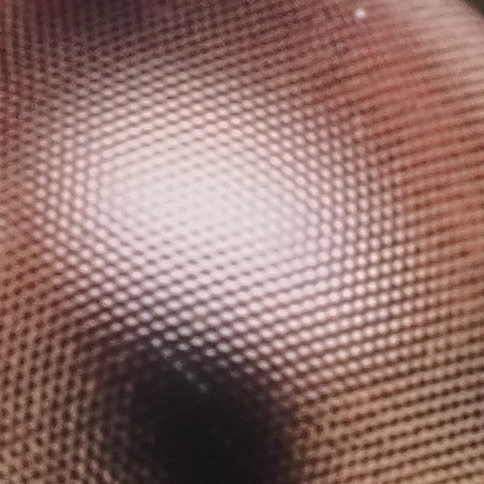
Looking just at a blow up of the eye highlight:
Impact of processing to each raw
With Tone Curve
Without Tone Curve
Initial
Processed
As you should hopefully be able to see the tone curve blows the highlights in the middle of the eye, and while we can recover some detail with careful processing we still have that hazy section in the middle. We can retain more contrast and preserve the highlights better without the tone curve.
Finally, here is the same image exported directly from Olympus Workspace as a JPEG and post cropped in Affinity. As you can see the Olympus software lightens the tone curve mapped image naively , and no sharpening results. While the JPEG version of the image is acceptable for web use, the crop shown would print just over 1½ inches on a side, so it would be clearly visible on a full sized print.
If you look back up at the histogram where we imported into Affinity, this image is slightly underexposed, and the histogram shows nothing in the top section of the highlights, so there is no way this image should be blowing highlights. If I'd used ETTR in the camera I'd probably have given this image another ⅓ stop exposure, and lost even more of the highlight detail. The problem here is the histogram is a sub sample from the JPEG in camera shown in a very reduced form. The small highlights on the eye represent a tiny portion of the image and don't show in the histogram even in Affinity on a big screen, so making judgements in camera based on the histogram can be very dangerous. Knowing insects tend to highlights around the eye facets I exposed accordingly, which in this case was the recommended exposure, but I could possibly have gotten a better image by dropping ⅓ stop, without harming the shadow detail. Note I don't recommend ETTL, although I don't condemn it, but I definitely have been stung by ETTR and would not recommend it, because while the theory is sound, the practise is not well supported by the equipment I use or my goals.
Deep Dive
Having seen an image processed through the green route, let's have a look in more detail into each of the tools I used here, and a couple more I didn't use.
Focus Stacking
There are broadly three options here, and I'll go over the pros and cons of each.
In camera
The Olympus cameras allow the automatic alignment and processing of up to 15 images at a time, and I hardly ever use it. The main issue is it's slooooowwwww. The Mk III takes 9 seconds to fail with 3 frames, and about 18 seconds with 15. Which kind of sums it up. Testing the speed I hand held it and pointed at my mug. It took the requisite frames rapidly then errored. No explanation why, though it did save the RAW frames which in each case were stackable by other software. In fact I tried a few runs and only managed to get one bracket of three to stack. I gather the OM-1 is faster to process, but I doubt any better at processing.
The functionality can be used in post by tethering to Olympus Workspace and using the camera as a custom co-processor, but I've never tried this as I have better options.
One note though, I do know another photographer who uses the in camera stacking all the time in the field, but he seems to have impossibly steady hands, is using the OM-1 and the new 90mm. I gather the 90mm has an extra accelerometer which gives focus stacking info to the camera, and improves the reliability of stacking, but even he wants more than 15 frames, even with the +5 stacking interval and uses Helicon in post. I've tried his working approach and it does not work for me, the output doesn't even stack well in Affinity, the most forgiving of the applications.
Helicon Focus
Helicon has numerous advantages. It will process RAW files to a DMG output using Adobe DNG converter to mediate, so you have a file that is partly processed but can still be handled as a RAW in Affinity to some extent. The interface is relatively simple and the application is fast once the RAW files have been pre-processed. If you throw TIFFs at it the speed is extraordinary, but to do so requires the RAW processing time to be spent elsewhere, in Affinity or Olympus Workspace. The only limitation I have found is temp space, because it has a habit of filling my main drive with converted RAW files. Even that can be handled though by pointing it at a slower and larger disk.
I frequently use the batch mode, quickly sorting files with a script or FastRawViewer into folders and running Helicon on them. This gives me a set of outputs ready to use, or with some clarity about changes I need to make. This is somewhere it scores over the other tools which don't allow batch processing of multiple stacks.
Press play for the high resolution video.
Transcript
00:00:00.000 --> 00:00:43.000
Here's one we prepared earlier
I've shortened the time by preloading images
00:00:43.000 --> 00:00:46.000
Looking over at the depth map
this is almost an image itself
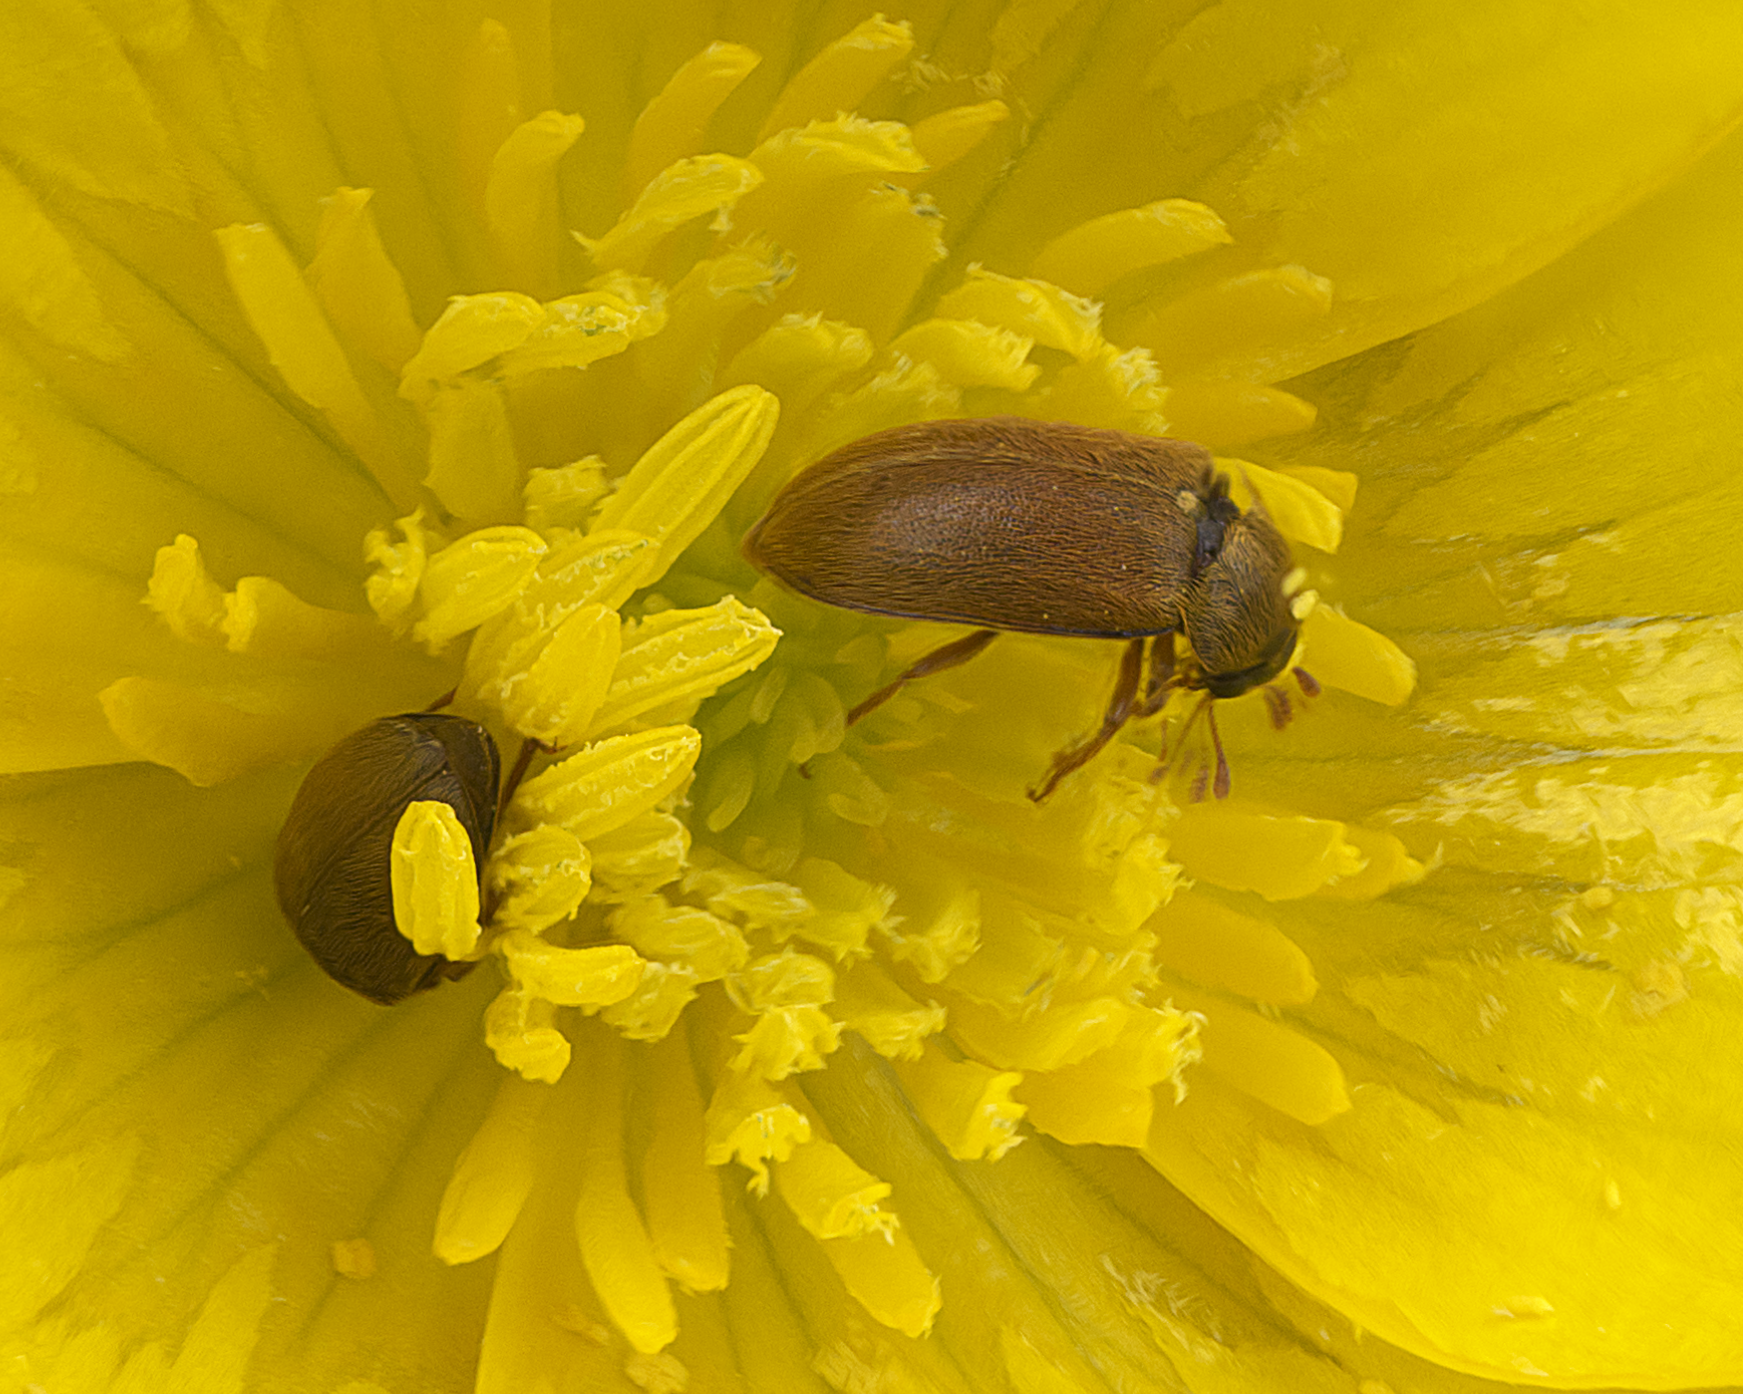
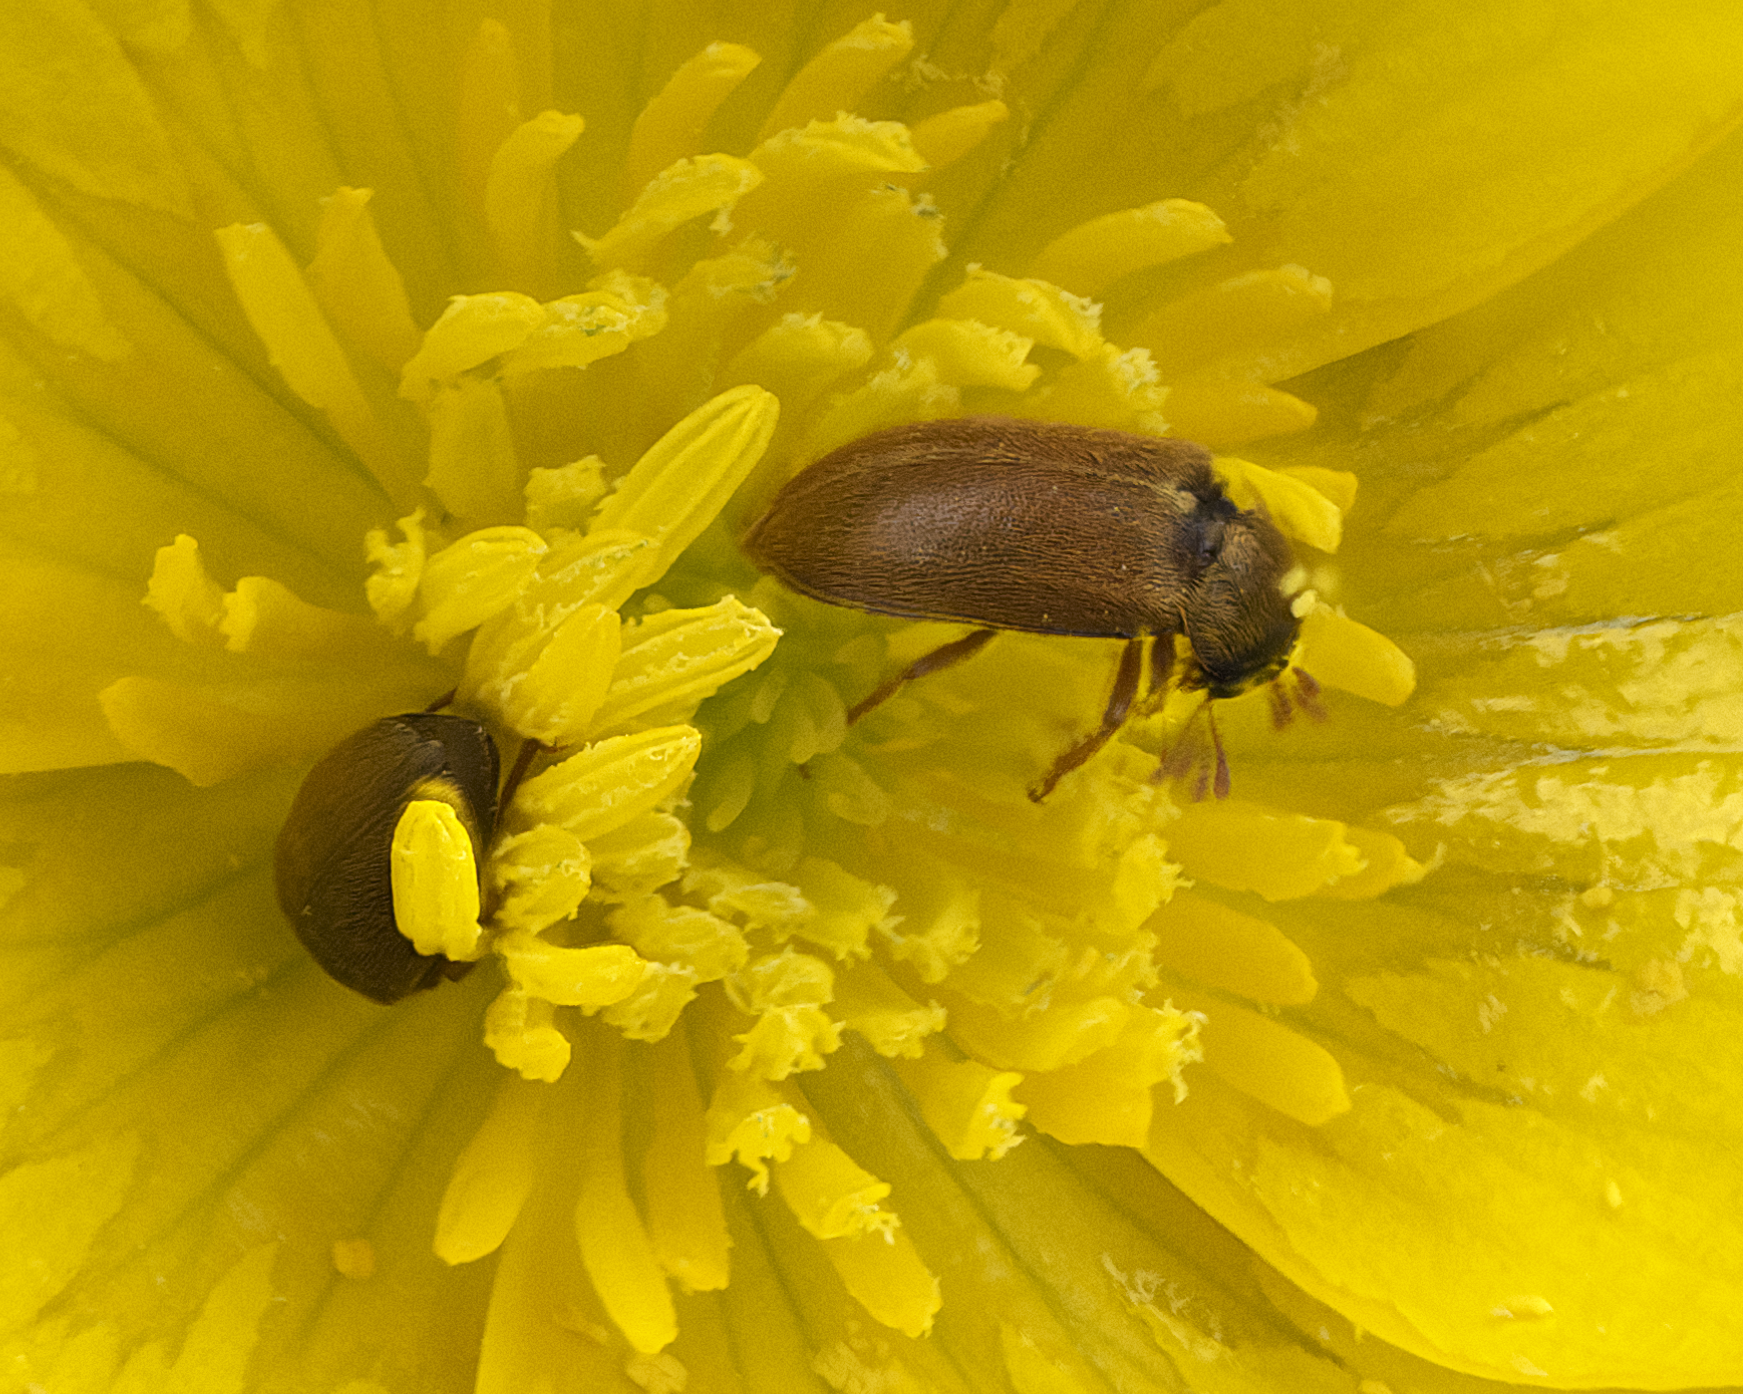
The next advantage it has is that it has a range of stacking processes. These give varying results depending on the inputs. I tend to use B mode where I have a stack with little or no background, i.e. the while field of vision is in focus, or is so far out of focus or dark as to be ignorable. Mode B tends to create rather unpleasant mosaics because any movement or light change in the background contributes to the final image. It also tends to have a bigger issue with focus edging, where foreground objects mask the background outside their limits. B is also better where there is a moving element like a bug waving antennae as it tends to drop any out of focus elements leading to banding if the bracket is not overlapped well. You can control the radius, this mostly helps with images with poor overlap between frames, and I tend to over shoot. In practise I tend to do both B anc C brackets and have used masking to merge them where necessary.
Mode C is better where you have a stack with issues or a background but takes into account the nearby out of focus elements more, so a walking bug becomes a trail.
Comparison of stacking modes
Mode B Crop
Mode C Crop
Ignoring the background which is smoother in mode C, from the closeups you can see that mode B does better with the moving beetles, where the shell of the beetle is better resolved, though neither copes with the antennae well. The ideal here would be to mask out the background from mode B replacing it with that from mode C. The antennae can then be cleaned up using inpainting. I'll leave that as an exercise for the viewer.
Helicon does have a few quirks. It is not very good with noise in images and can compound the noise across frames, rather than reduce it as you might hope, so on any image bracket with visible noise it pays to convert to TIFF and preprocess with Topaz before stacking.
In terms of brackets it can be very stupid. One bad frame, from another bracket, or a High Res frame in the bracket, or excessive movement stymies it totally and you can get ridiculous results. You need to go through each bracket before processing and ensure there are no totally out of focus frames to waste time, or cause cropping. You need to remove any frames with movement as it sometimes finds in focus movement blur. But having tidied up it is usually reliable.
Auto Cropping is available and seems based on movement as well as focus breathing. So you never get a full frame out of Helicon. If you switch the cropping off, rather than get a blurry edge you get like a zoom blur making the edges unusable. Which is irritating, so on long stacks you can lose a lot of image size.
One annoying quirk that gets on my nerves is that where you have a process set up to save to DNG, if you then process a TIFF stack, the output cannot be saved to DNG, which is fair enough, but rather than default the save dialogue to TIFF from DNG or in batches autosave to TIFF it fails, or errors. It also has a quirk whereby it offers uncompressed TIFFs, which are not as useful as they were when the LZW patent still existed, nowadays I have nothing that handles uncompressed TIFFs, and personally I've been using use FLATE for about 15 years anyway.
Helicon has an interesting party trick where you can output the individual portions of each image used to a stack of files for layering elsewhere. This is almost totally useless because the masking it applies seems to have a feathered transparency on each layer which means you get a lighter halo on each image when you layer them in Affinity. Which is a shame because I was looking to try and use this to introduce fog into landscapes by stacking and inserting foggy transparent layers into the stack. For macro work it's irrelevant as I can't think of a use for it.
Finally, despite the power and speed of the stacking processing, the post processing in Helicon is painfully slow and imprecise. It's almost unusable, though when I questioned Helicon about this they were quite polite about the adequacy of the top of the range fully loaded iMac I was running it on. This and other issues may have improved in later versions, but despite them this is still my preferred choice.
Affinity Photo
Affinity offers focus merging, with no controls or options. It seems to be a hybrid of the various modes in Helicon, and can produce a good image when Helicon is struggling either one way or the other. It scores over Helicon in that it doesn't crop, but it does have similar problems with aligning stacks with movement. Generally I'd say the stacking is as good as Helicon in most cases, but suffers from being very, very slow by comparison. I have benefitted from using Affinity though, for instance the white cornflower panorama stacked better in Affinity than it did in Helicon, with fewer artefacts to post process.
The cons to Affinity come down to speed and when you have any kind of problem. Although it seems slightly cleverer than Helicon, there is no way to improve a bad stack, whereas in Helicon you can start checking particular frames and their contribution and eliminate them dynamically. Testing removing a frame in Affinity necessitates a whole new stack, in Helicon you can take advantage of pre-processing and just reprocess the output using existing in memory data.
As a speed comparison, I processed the Herb Robert image from the video in Affinity and Helicon. The image is a stack of 143 images, and Affinity grabbed the GPU but was still developing and aligning images when Helicon finished after 7:20. As you can see from above, 6"30 of that was opening images. Affinity took about 9 minutes to open and align the images, and finished merging after 16 minutes but with an image that was the full uncropped size, meaning it showed the original intended composition, which in this case included the 'snake' in the garden.
Noise Reduction with Topaz
Topaz Denoise AI is one of several noise reduction systems available. At the time I bought it the user interface and effectiveness were about the best. There being a trade off of time spent fiddling versus results. Many applications suffer from this, and Topaz hits a reasonable sweet spot in that you can get good results very quickly, though sometimes excellent ones need work. I tend to rely on the auto settings most of the time as they behave much as I like. I have played with masking and restoring original details and it is a rabbit hole down which many hours could pass. I think to justify the 'AI' label apps like this need to intuit the user intent, and the controls here do that reasonably well.
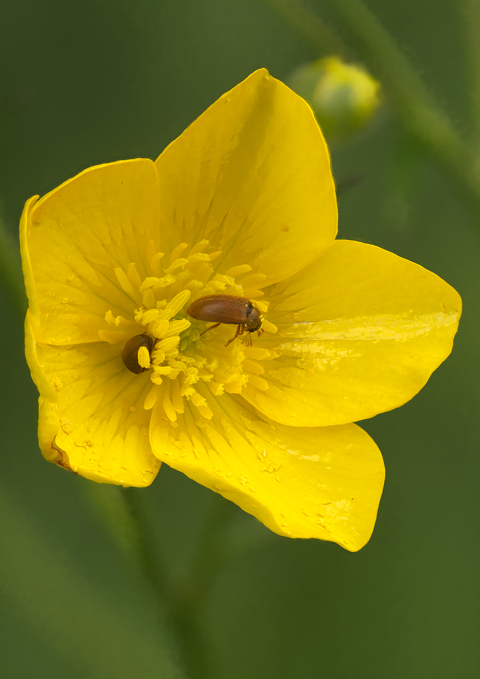
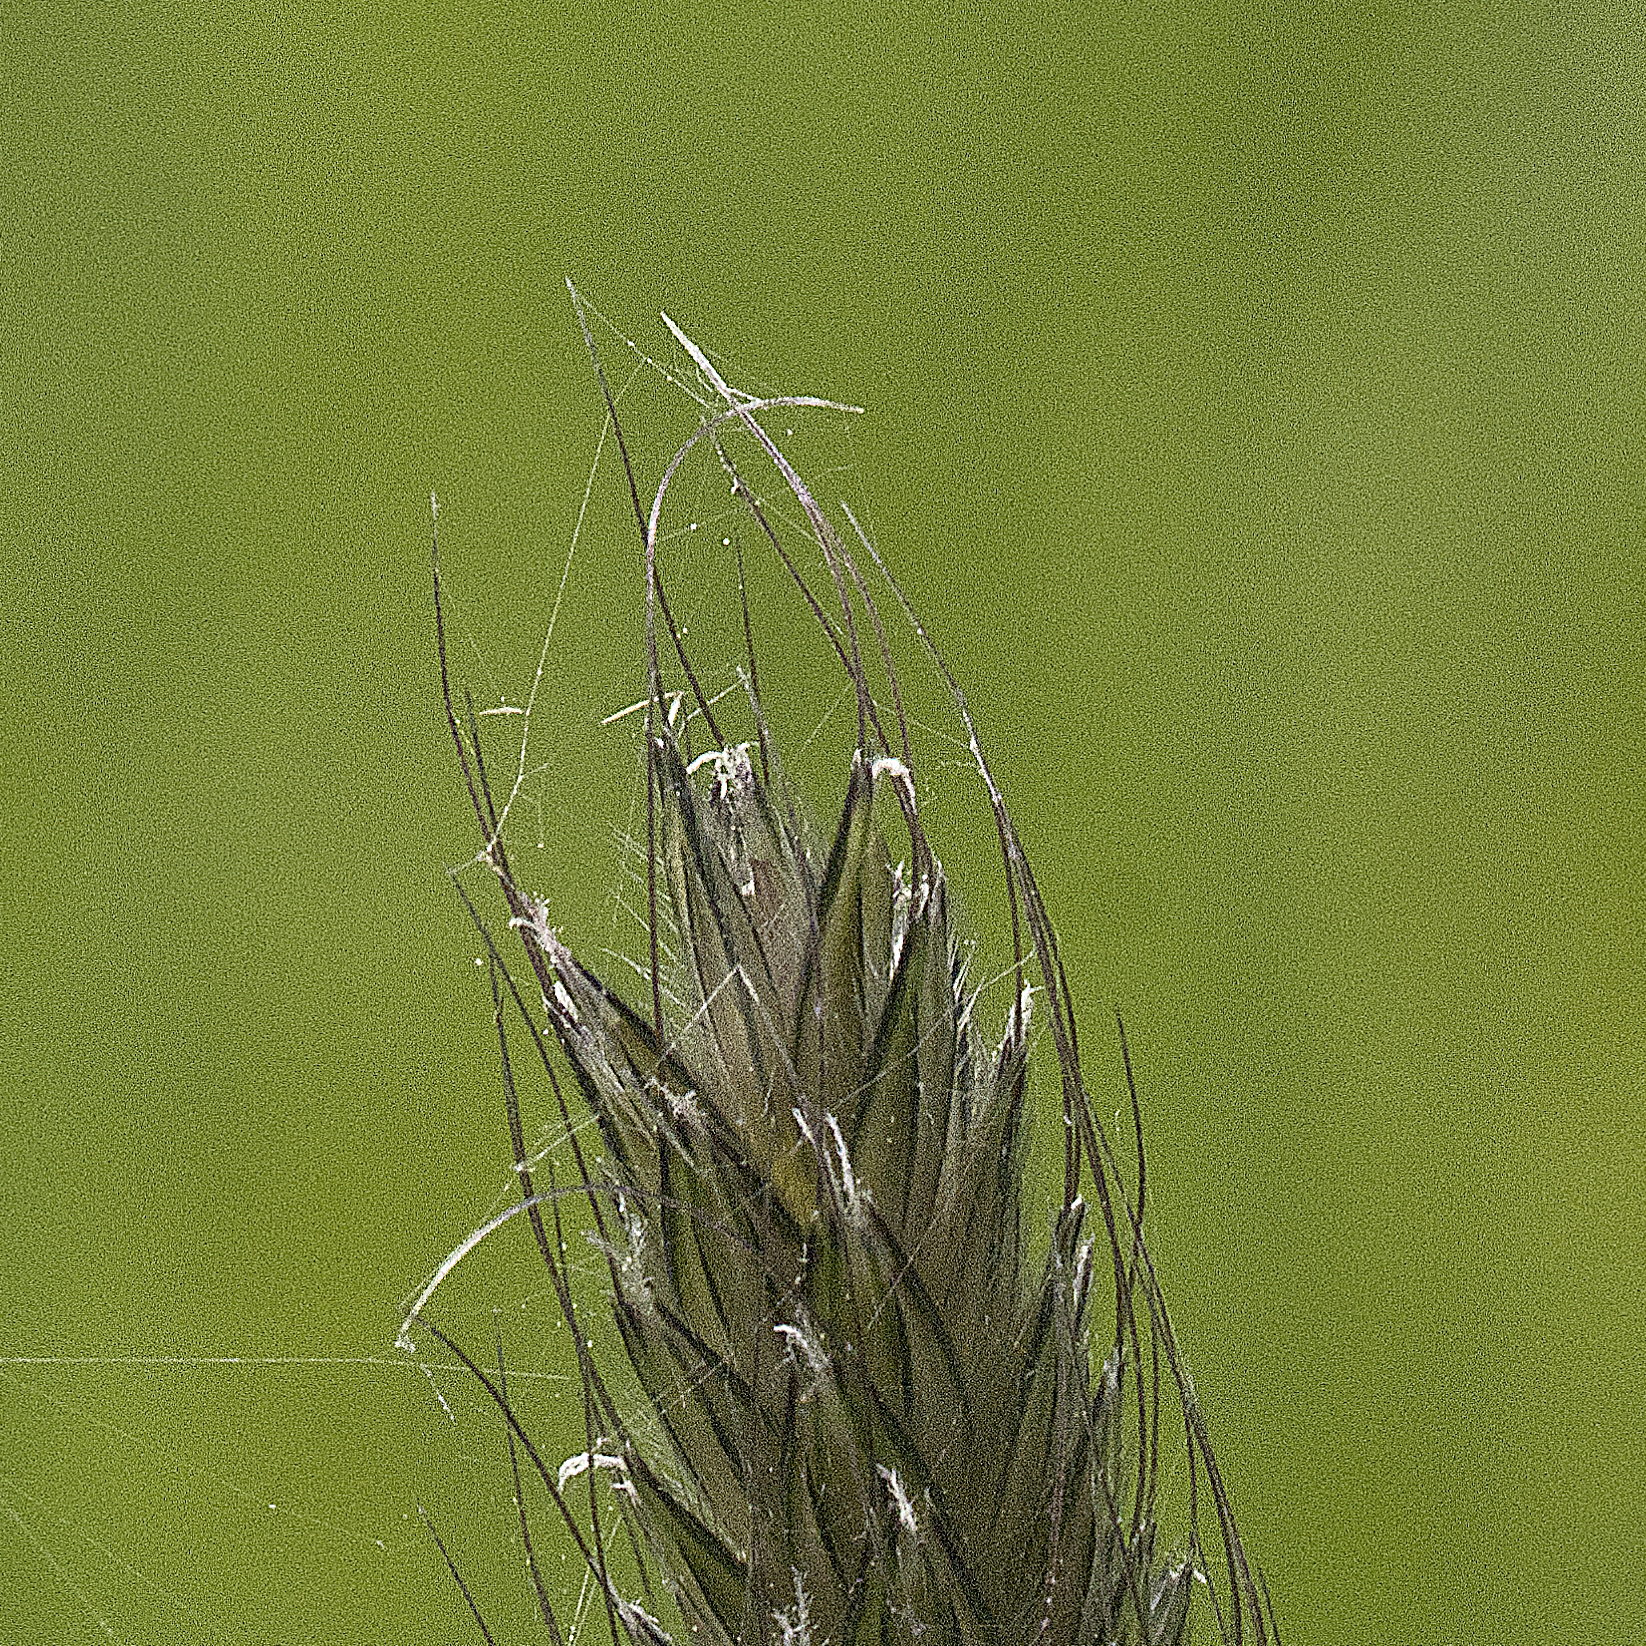
Despite the fact it can handle some quite noisy images and make them useable, it doesn't work miracles and you are still going to lose detail. However given the choice between no image and one with less than perfect detail sometimes the content of the image makes it worthwhile. For example let's compare a couple of images of a lurking spider on a grass seed head. One with flash at 200 ISO, the other the flash didn't fire and the ISO is 3200. Now on some cameras ISO 3200 is fine, but on the E1 Mk III it's fairly noisy. Putting both images through the workflow, the flash image goes into Topaz which sharpens at 20, but the auto detection sets the noise reduction level at zero. The natural light image gets a Noise Reduction level of 12, and the same sharpening level.
Comparing the outputs, minus the spider. Note the noise has been enhanced by the processing, so it's a bit more noticeable than it is in the unprocessed RAW. Even so this shows how the image is recovered. Looking closely you'll see the denoise image still has noise around areas of detail, but the background away from the subject is silky smooth.
Comparison of denoise and content
Denoise applied
Raw
Natural light
Flash
While in the crop it's hard to see the point of keeping the background in, there are 2 advantages. First off not everyone likes low key, and low key is not just an aesthetic, it is part of the story telling. Secondly in this case the spider is reflective and the highlights blew from inadequate diffusion. Even with a polariser on the lens. Sometimes you want to keep the background in, even out of focus because it's part of the context of the image. In this case the seed head waving over the field. The background is not distracting, but is context. Conversely there are times when you want the background low key, or you just cannot get a well exposed or sharp image without flash. Even on a still day grass heads like this wave, and it was only the acceptance of a higher ISO that allowed the freezing of the movement. In this case the denoise processed image is better than the flash, but neither ends up a great spider picture. Not just because I've omitted the spider from the crop.
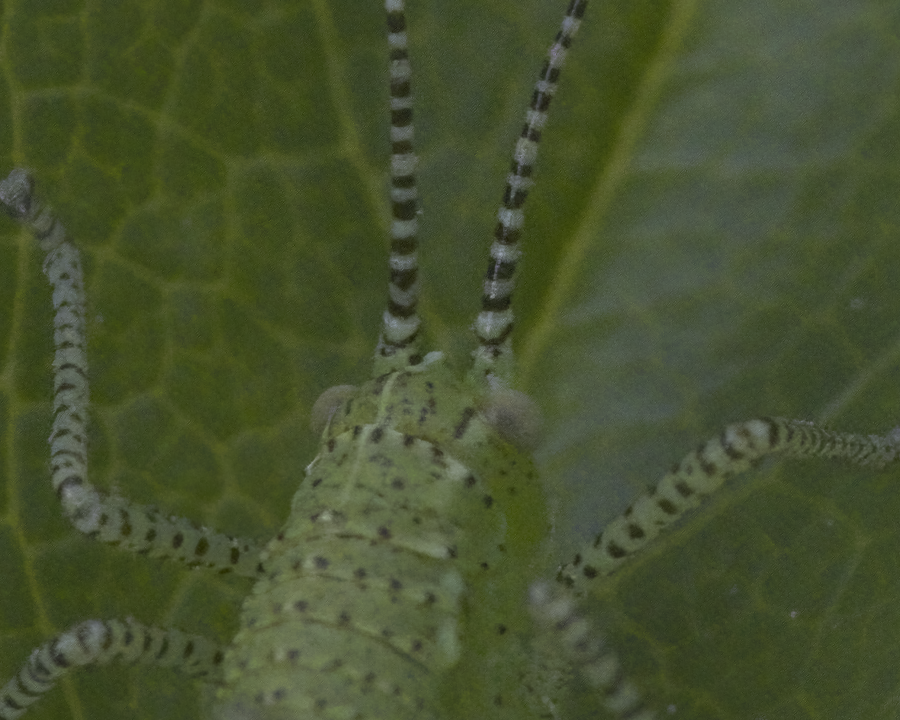
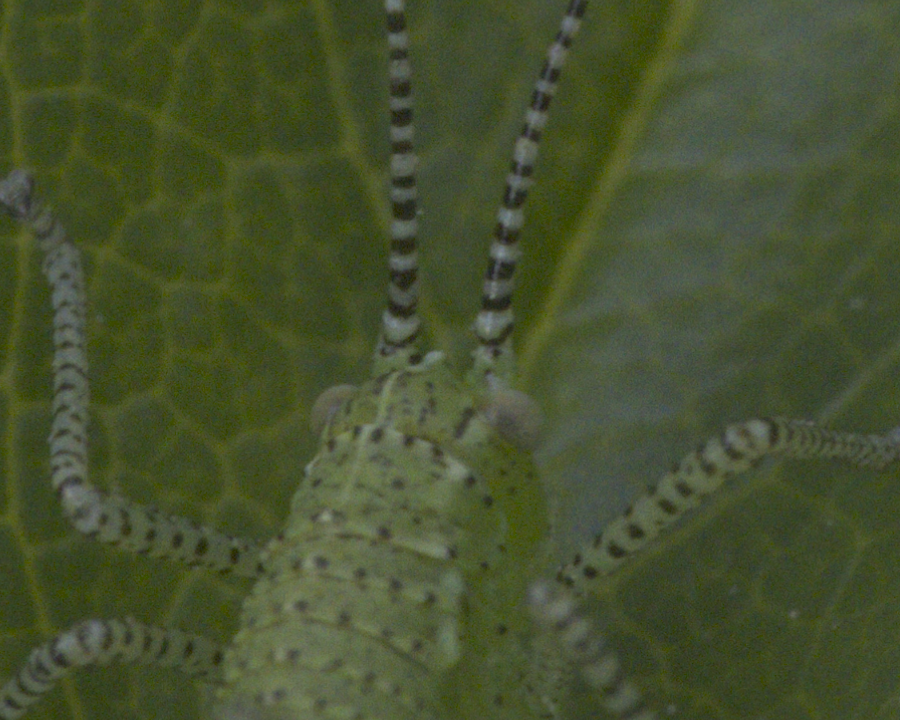
Looking at another example, here's a heavy crop of a recent picture of an insect on a leaf. As you can see the raw natural light image lacks detail and looks blurry, with false colour in the out of focus areas. Processed though some detail comes back and the colours are protected. However the flash version shows slightly more detail and crucially detail in the eyes. Both flash and natural light exposures are usable, but in this case the flash lit version has another benefit, the flash has overcome the shadow cast by the leaf.
Comparison of denoise and content
Denoise applied
Raw
Natural light
Flash
Further Post Processing Flow in Affinity
Detail Refinement
This is the first tool I apply when doing RAW development in Affinity. In fact I use it even when I've used a different RAW processor such as Olympus Workspace because it often finds extra detail resolution. It seems to work as an Unsharp Mask (USM) but very early in the process, and with some intelligence. When we come to look at Unsharp Mask later you'll see it's very easy to create hideous halos and artefacts with USM, but the detail refinement tab rarely goes wrong. From a pro side this is applying sharpening very early in the process, but the tradeoff, and the reason Noise Reduction is on the same tab is that it can enhance any noise. If you ramp the detail refinement up too high then you will be increasing the visibility of unwanted noise, and so the sweet spot in any image is where the detail recovered is the maximum for the minimum of noise. Consequently, although I have a preset to maximise the detail refinement, in practise that is a shortcut for large batches of web only images and saves me pulling up both sliders when I'm working on an image I want to get the best from.
Let's look at some examples.
Press play for the high resolution video.
Transcript
00:00:00.000 --> 00:00:07.250
first off we'll push the sliders to maximum using the preset.
00:00:07.250 --> 00:00:25.250
Then we zoom in on a section where we have detail and background
00:00:25.250 --> 00:00:30.500
If we pull the radius slider down we can find a sweet spot around 65 percent/pixels
00:00:30.500 --> 00:00:35.750
and a second around 42
00:00:35.750 --> 00:00:42.000
Pull down the amount slider to see if we can get away with less
00:00:42.000--> 00:00:44.750
but not really so reset to maximum
00:00:44.750 --> 00:01:01.500
Let's add in luminance noise reduction to counter the detail refinement
00:01:01.500 --> 00:01:23.250
now have a look at the effect on the centre of the flower
switching detail refinement and noise reduction off
00:01:23.250 --> 00:01:30.000
take off the noise reduction since we'll do a more sophisticated NR with Topaz
and we're ready for the next step.
As you can see in the video pulling the slider down for the radius there are a couple of sweet spots here where the detail refinement improves then plateaus. In this case around 42 and 70 ish. With the Olympus there is usually a spot around 12 which is useful for landscape type images, but here we are squeezing detail at the cost of noise, so we aim for the highest plateau and rely on AI noise reduction from Topaz to offset the visual noise.
Clarity
Clarity is a kind of sharpening, but it has quite wide ranging effects. According to Affinity's help it increases local contrast in the mid range tones. However it does seem to have impact across the whole range of tones, and in fact I'd say it feels more impactful on highlights. This may however be an illusion caused by the spread of the histogram. In fact if you watch the histogram during the video when toggling clarity on and off you'll see the histogram broaden and contract. So exactly what is happening is privy to Affinity, but the effect is rather useful.
Press play for the high resolution video.
Transcript
00:00:00.000 --> 00:00:08.000
first off we'll push the sliders to maximum
and back to minimum
00:00:08.000 --> 00:00:15.000
see the detail in the wings appear
but the background also becomes more resolved
00:00:15.000 --> 00:00:30.000
let's zoom in and see it on the head
00:00:30.000 --> 00:00:50.000
setting it to a high value let's have a look at the impact on the rear wings and dark abdomen
00:00:50.000 --> 00:00:55.000
let's look for other plateaus
there's one around 15%
00:00:55.000 --> 00:01:00.000
another around 42
00:01:00.000--> 00:01:07.000
and another around 60
00:01:07.000 --> 00:01:23.000
zooming out 55 looks good
00:01:23.000 --> 00:01:36.000
switching to using clarity in a layer after development
setting it to 56
00:01:36.000 --> 00:01:43.000
look at the impact across the image
00:01:43.000--> 00:02:23.000
if clarity focuses on midrange let's try a gate
to see if we can isolate the effect to the foreground
00:02:23.000--> 00:02:58.000
and reversing the gate
it shows that the wing is still in the mid range
In favour of using clarity is the resolution of detail, which it does, but on the converse side, it applies this to foreground and background. I've seen comments from portrait photographers that suggest they use clarity to compensate where part of an image is not entirely in focus, as there is a perception that clarity can bring an out of focus area back to acceptable sharpness. This does happen to an extent, but it doesn't work miracles and it is generally of no use for this in macro work because the sharpness falls off so drastically with the narrow depth of field commonly found.
More generally though, where you have a subject in focus, and the background thrown out with lovely soft bokeh and pleasing abstraction, clarity can introduce posterisation and make the background unpleasantly distracting. This is really a big problem with macro work where the background is rarely in focus. The trade off here is usually to skip clarity enhancement during the develop phase and rather apply a pair of clarity filters to the image. One filter will enhance clarity and is masked for the foreground, the other is optional and reduces the clarity of the background using an inversion of the mask from the first filter. It's usually worth feathering the mask so the background immediately adjacent to the subject drops off clarity, as feathering into the subject is usually more noticeable.
Unsharp Mask
Finally we come to a tool which is less of a software specific custom function, and where the algorithms are well defined and the behaviour known. Therefore I'm not going into a lot of detail about how it works, since it is well documented elsewhere, but I'll go over a summary and show you how I use it.
The reason Unsharp masking is less proprietary and better known is that it predates digital photography and has been used in sharpening for astronomy and other areas for a long time. The principle is edge sharpening, by subtracting (or masking) a smoothed (or unsharp) image from the original. Typically this is done by creating a copy of the image with a Gaussian blur applied. This image is combined with the original using a scaling factor. Optionally you can have a threshold which looks at local contrast and does not apply the conversion in low contrast areas.
The larger the radius therefore the more the image is smoothed, and this in turn can cause issues. A pale edge feature, can be smeared over a large area, and cause a halo to be formed around the features, which rather than peaking the contrast leads to a distracting mess that almost looks like a Find Edges filter has been applied.
Press play for the high resolution video.
Transcript
00:00:00.000 --> 00:00:11.000
Let's start by adding an unsharp mask filter
and push the factor to maximum
00:00:11.000 --> 00:00:26.000
slowly raise the radius to maximum
and find the sweet spot
00:00:26.000 --> 00:00:30.000
then pull back the factor to find the best level
00:00:30.000 --> 00:00:36.000
raise the threshold
00:00:36.000 --> 00:00:41.000
but since this is a low contrast image it soon cancels out
so drop it to zero
00:00:41.000 --> 00:00:51.000
add a second filter and raise the factor
00:00:51.000 --> 00:01:08.000
raise the radius to find a lower sweet spot
00:01:08.000 --> 00:01:13.000
adjust the factor
00:01:13.000 --> 00:01:19.000
add a third filter
with a smaller radius yet
00:01:19.000 --> 00:01:36.000
adjust and this gives us a much sharper result
from a low contrast original
This is a low contrast image at high magnification taken with the Mitakon. There has been no noise reduction or other sharpening applied, this is a raw frame. Watching this through you can see the halos starting to form, but because of the low contrast even at a factor of 4 you don't get much of a problem, though it looks unnatural. The first sweet spot is at 29 pixel radius. Adding further filters with smaller radii helps by picking up on the enhancement from the previous filter or filters and tweaking that further. Note you can start to see other problems appearing where the noise is also enhanced, as well as it starting to pick up on the pixel mask in the sensor. It is also worth looking at the impact on the histogram. As each filter is applied the histogram is boosted, as the contrast is increased.
It would be possible to do this using a gaussian filter. To achieve the same result you need to create the 29 pixel gaussian blur and subtract it from a copy of the base image. Group this and use Add blend mode to apply it to the base image. Duplicate the Group 4 times then reduce the opacity of the fourth Group to 13% to match the total factor of 3.13. You'll see this has the same effect as the first unsharp mask. Needless to say the Unsharp Mask filter tool is much quicker and easier to apply.
High Pass filter
This uses frequency separation to identify the sharp edges and then merges the edges back on to the image using a light blend mode usually. I generally avoid it because it tends to be the most destructive of highlights, since it is lightening the highlight detail edges. It works best on contrasty images with no bright highlights which means it gets used rarely as I often have highlights from lighting to deal with. If I do use High Pass to sharpen it will be at the very end of the process on an image that is otherwise optimised.
Press play for the high resolution video.
Transcript
00:00:00.000 --> 00:00:10.000
Using a contrast enhanced version of the buttercups
add a high pass filter
and we get a plain grey
00:00:10.000 --> 00:00:18.000
increasing the radius gives us the edges almost
this is a frequency split though, not the classic find edges
00:00:18.000 --> 00:00:27.000
find a reasonable level where we get features
00:00:27.000 --> 00:00:32.000
the secret sauce is how you blend it
00:00:32.000 --> 00:00:39.000
use light type blend modes
hard and vivid often work well
00:00:39.000 --> 00:00:48.000
but avoid Hard Mix I think
00:00:48.000 --> 00:00:51.000
set to vivid or hard
vivid looks good
00:00:51.000 --> 00:00:59.000
adjust the radius again to get a good balance
00:00:59.000 --> 00:01:14.000
Levels and Curves
Somewhere in amongst all the sharpening you need to adjust the image to recover the tone curve that was switched off to allow for all that extra sharpening. I do this in 2 ways. The first step is to stretch the histogram to the maximum I can get away with using a Levels Filter. Mainly this allows me to hard set the black point, and then I can adjust the white point to avoid clipping. If the image is already clipping shadows, then I skip the Levels. I've noticed that the Olympus tends to have a fairly consistent head space with realistic looking sharpening, so often there's an amount of stretching I can do even with the sharpening applied. Once I've done that I use a Curves filter to control contrast and balance highlights and shadows. Depending on the image there may be multiple curves to achieve different effects.
Press play for the high resolution video.
Transcript
00:00:00.000 --> 00:00:11.000
first off we'll add a Levels Live Filter and tweak the black
00:00:11.000 --> 00:00:28.000
look closer at the impact of raising the black level too high
00:00:28.000 --> 00:00:41.000
now looking at the white end, move the slider down to the top if the histogram
pick some bright pixels and make sure we have differentiation still
00:00:41.000 --> 00:00:50.000
finally look at the effect overall.
you can see the improved brightness and contrast.
The levels filter also allows for gamma correction, which brightens or darkens the image. This is not quite a gamma function as it can push the white point up, but it is broadly similar.
The other trick available on the levels filter is to modify the output levels. This allows the opposite of stretching, where you compress the histogram. This is helpful with high contrast images or reducing posterisation. I use this very rarely, but I have on occasion. It generally isn't much use in macro though.
The related tool is curves. Curves allows you to replicate the levels filter, but with a little less ease, as well as allowing you to replicate almost all the other colour and light filters. Mastering it may take a long time, but fortunately you do not need to, because there are specific filters like brightness/contrast, or HSL, or white balance, which give you more control. Generally doing something typical like increasing contrast via curves it the long way to do it, but it gives much, much more flexibility if you need it. Usually when fiddling with contrast or gamma, I do it in curves, because I can use the extra flexibility there. However I'd never dream of switching the Curves filter into LAB space to correct white balance for example. The video below does a slight enhancement to the demoiselle image, in line with the processing I did when creating this version of the image.
Press play for the high resolution video.
Transcript
00:00:00.000 --> 00:00:10.000
add a curves Live Filter and have a play
00:00:10.000 --> 00:00:17.000
first off raise and lower the midtones
this simulates a gamma function
00:00:17.000 --> 00:00:25.000
then we can move the black and white points in the same way as levels
so the functionality of the levels filter can be replicated here
00:00:25.000 --> 00:00:28.000
resetting
00:00:30.000 --> 00:01:03.000
Editing and showing the whole image with the required curve
Channel Mixer
The Channel Mixer is a great trick for the end of processing, and I picked this up from a professional colour grader. The trick is to remove data from 2 of the colour channels from the third, whilst boosting that channel. It sounds complicated, but if you set it up as a preset, it becomes easy to apply. I have two variations on it as sometimes where an image is very green, modifying the green channel is very hard to control.
The essence of it, as I use it, is to take each channel in the mixer and add 20% to that channel, removing 10% each from the other 2. The upshot is to keep the exposure and lighting, but it seems to boost the colours in the image. I tend to think of it as being purifying the colours, but that's just a conceit.
The maths is simple but, probably needs some explanation.
Total coverage in the pixel is therefore conserved because we have 120% Red in Red channel, but remove 10 % from each of green and blue, making 100% in all.
Let's look at some examples.
original pixel
output pixel
R
G
B
swatch
swatch
R
G
B
80
20
10
93
15
2
5
27
34
0
29
38
10
10
10
10
10
10
90
90
90
90
90
90
20
10
10
22
9
9
30
10
10
34
8
8
40
10
10
46
7
7
50
10
10
58
6
6
60
10
10
70
5
5
70
10
10
82
4
4
80
10
10
94
3
3
90
10
10
100
2
2
100
10
10
100
1
1
100
30
30
100
23
23
70
30
30
78
26
26
50
30
30
54
28
28
30
30
30
30
30
30
It might be hard to tell from the swatches, but what is effectively happening is the hue is being retained, but the brightness is increased (less black) and the saturation increased. The values are calculated but cropped to the image range, so you never end up with over 100%. You could do this with an HSL type filter, but this is probably more controlled, quicker and neater. The principle upshot of applying it is images seem to 'pop' a bit more, they are more vibrant and appealing without skewing the colours. I occasionally apply more than one layer of this, and I often use the opacity to control it, as sometimes it can go a bit garish if some of the colours are very saturated already.
The reason I end up using it at all on pretty every colour image relates to the fact the camera is a Quad Bayer design which is demosaiced during RAW development. This process takes the signal from the 2 green, 1 red and 1 blue elements of the Bayer grid and processes this to an image grid of R,G,B pixels. The way this happens for the Olympus cameras I feel creates a slightly muddy tone, where the R,G and B values are not as pure as you'd like. If you want to test this scientifically, then you can with your camera and a colour test chart under controlled lighting. I doubt you'll ever get a pure colour. Though shooting the scarlet elf cups, they really saturate the red channel, so maybe it is possible.
High Resolution Images
More problematic is actually working with the camera high resolution mode where you seem to get a specific noise pattern that is identifiable using a 2d Fourier transform. That noise seems an artefact of the image blending algorithms and I have had instances where the standard resolution image had more actual detail than the parent high resolution shot of the same scene because of this. Affinity have an FFT Denoise filter which is destructive, but can be used to correct for this pattern noise. Having just found a recent image showing exactly the pattern noise, I decided to correct it, then post before, after and diff images. However, on processing the FFT denoise made a very subtle difference that is hard to show. In the below example, the centre of a white iris has been brutally cropped, and processed. The difference is then scaled across the histogram, and is further shown enlarged so you can see the pattern.
Comparison of FFT denoise
Before
After
Image
FFT filter and enhanced difference
Aside from the pattern noise, the HR RAW files that come out of the camera are quite soft, much softer than the standard resolution RAWs. If you put them into Helicon, that softness transfers into the Adobe DNG Converter output and on to the focus stacked files. If you want sharp images from Helicon, then the inputs need to go through a RAW Converter which can improve the sharpness when stacking. I got in the habit of doing this with Olympus Workspace, but just lately I've found that the default TIFFs from Affinity stack well and post process nicely. The advantage of Affinity being that I can use the linear mode without tone curve and then put the output tiff into the develop mode to do detail enhancement. So the wheel turns and I've started to use Affinity on HR files instead of Workspace. Which reduces my dependency on it to … errr … creating TIFFs from in camera mono shots.
Cropping
And finally.
When it comes to cropping or removing items the goal is story telling and getting a good composition. Quite often I find that I've composed mentally in a 5:4 (or 4:5) ratio, and that is most often the ratio to which I crop. Odd given I rarely change the viewfinder from the full 4:3 ratio, but it's true. This probably goes back to printing in the darkroom where the loss going from 3:2 35mm film was more extreme. I suspect there is something I learned from printing in the darkroom that influences my composition style, but it is very rare that I cannot sensibly crop to that ratio. Having said that, the exception is usually extreme macro where I want every last pixel I can squeeze.
Just to give an example though, the exhibition images for my first exhibition are all printed at 5:4 to fit 50x40cm frames. I did cheat slightly with the fungi by adding white borders but the flower and insect shots are all naturally cropped to 5:4.
The other common ratio I crop to is square. There is something also about the square aesthetic, that probably comes from medium format, which I have done some of. It definitely is not so it will work on social media. Depending on the subject I may choose to crop to 1:1 if there are lots of rotational or angular symmetries.
The final set of ratios I often use are 16:9, 2:1 and 3:1 panoramic. Sometimes an image just needs to be wide. I don't use this often for macro work, but where I have for instance a bee on a daisy shot from the side, the image has a wide screen aesthetic that works well cropped to one of those ratios.
That dispenses with shape. The other reason to crop is to direct the eye to a detail. This is where the compositional art comes in. I won't try to give many examples here, there are plenty of essays on composition, rule of thirds, golden sector, symmetry and so on. The key here is to think about what you want the viewer to see, how you want their eye to meet the image. Leading lines direct the eye, so in the Herb Robert above, the petal edges in the upper half push the eye down and towards the centre. The anther covered in pollen stops the eye, but the star shaped stigma pushes the gaze back out. So the eye moves around the image, after seeing the bit you want the viewer to appreciate first off.
In the Willow Demoiselle the body and the legs both push the attention to the insect's eye, which is about a third of the way into the image. It is not centred on the top third line, that is the bottom of the clothesline, which holds the attention back down to the insect. The blurring of the legs around the clothesline in turn also don't pull the attention away, rather the eye seeks the sharper details.
Of course the other thing to remember is that all the rules are there to be broken, and sometimes an image works and you don't know why. Or alternatively no crop works and you cannot figure out what is wrong. If that happens, then it's usually back to the camera to work out a new composition in camera. Ultimately that is where the images are made. Post Processing can help you express an intent, or bring out details, but unless you get something good to work from, post processing cannot invent a pretty picture.
Finis
On that note, what are you doing reading this when you should have a camera full of interesting starting points which you can convert into your artistic vision. Hopefully this helps you to do that.